

I’ve shared a lot of my photography via social networks – Twitter, Facebook, Instagram and Flickr. It’s generally unlike other photography that you may see around the web. I generally don’t shoot people, unless the people are part of a greater narrative or scene. Never as the object of focus in the scene. I also have embraced the surreal… more commonly known as High Dynamic Range (or HDR) photography. You either love it or you hate it. You can see some of those on Flickr.
Last night, I was showing this picture to a friend who exclaimed, “How the hell do you do this?”… and while he is no photographer, I have had that question enough to answer that question here. Take this as a tutorial.
I will take you through the steps of processing a photo using my workflow. Photography is an art, though, and while the steps I use achieve the aesthetics I am comfortable with, you should absolutely tinker and play. You never get any better if you don’t. And obviously, know your camera… know how to see a shot. Composition is important and I don’t think it can really be taught… it’s an innate sense that you get simply by using your camera and practicing!
Camera
Obviously, you have to start with a camera. In the photo I am processing here, I am shooting with a Canon T5i and an EF 28-135mm f/3.6L lens. I’m shooting in Aperture priority mode with autofocus turned on. What this means, in laymans terms, is that I have a wide lens (28-135mm… it’s a zoom but the lower the number, the wider the field of view), with a middle of the road aperture (aperture is how wide your lens opens up when you snap a photo… the lower the number, the more light and the less depth of field). It’s also important to shoot RAW, as RAW captures much more image data than JPEG and allows for manipulation in software like Lightrooom.
Note: Shutter Speed is how fast the shutter opens and is, as it sounds, a time thing. Aperture is how wide your shutter opens… the wider (or lower number), the more light and the shallower the depth of field is brought in. ISO is your light sensitivity. Use this in combination with Aperture to enhance the exposure of light. A lower ISO means more exposure. A higher number represents less exposure (and more noise…. fine grained splotchiness… in the image). They are all important to know and use appropriately.
This is the photo of my fur kid on Christmas Day. We will be developing this.

Lightroom Processing
I import all my photos into Lightroom. Once I’m there, I have access to all kinds of non-destructive settings and if I shoot RAW (which I do), all the visual data, including visual information you can’t see… shadows, highlights… they are all there waiting to be drawn out.
In Lightroom, I have a few steps. I want to setup my key image (the image that we’ll do all other processing from, with the enhancements I’d like. In Lightroom, visit the Develop tab and work from the top of your toolbox to the bottom. The toolbox is on the right.
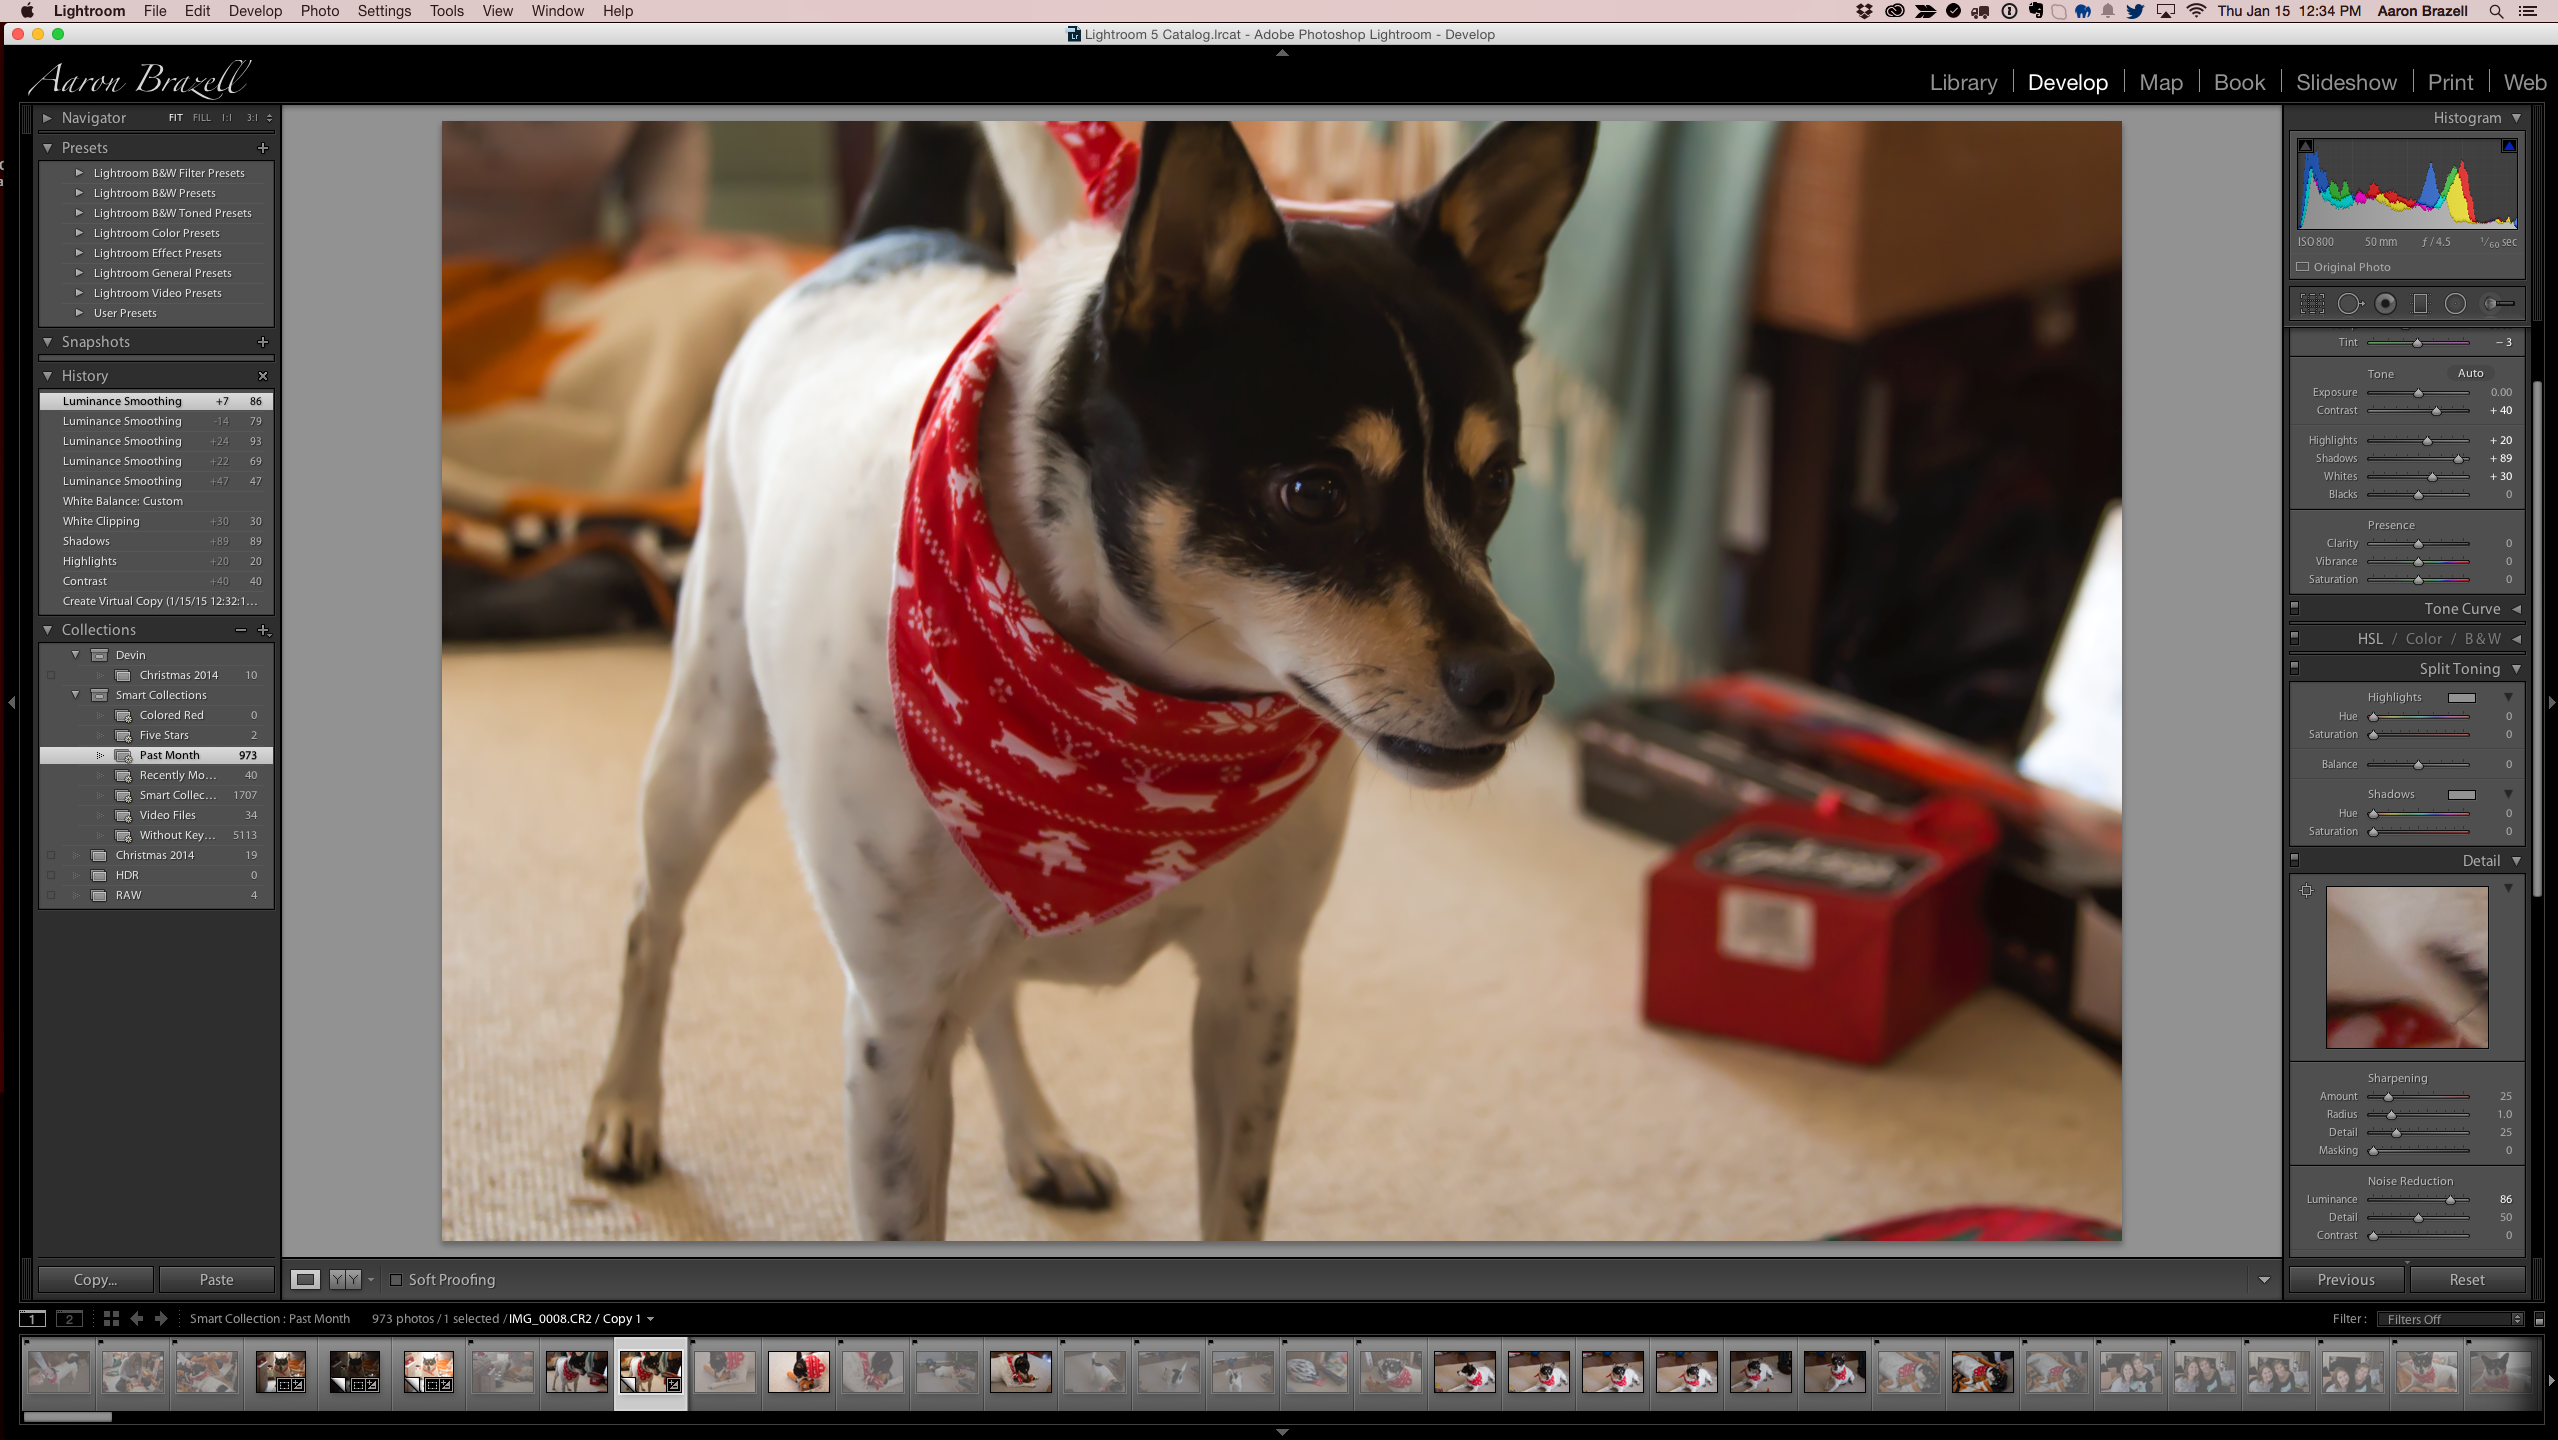
The initial list of settings I make on this photograph (and usually the settings I tinker with) are as such:
- Contrast: +40
- Highlights: +20
- Shadows: +89
- Whites: +30
- Blacks: No change
- Luminence: 86 – Luminence is important for noise reduction. See this great article on noise reduction
NOTE: DO NOT CHANGE EXPOSURE DURING THIS STEP
Exposure is saved for the next step. Technically, HDR is a style of photography that superimposes several images of different exposures over each other. You can do this with a camera if you have a tripod and the scene does not change between snapping photos and adjusting camera exposures. This is not practical in an action shot or where there is any movement. It’s easier to take one exposure and copy it and apply your exposure changes.
In the next step, I right click on the image in the filmstrip (bottom of the Lightroom view) and choose “Create Virtual Copy”. I do that twice so, at the end, I have three equal images. I leave the original alone and adjust the second image exposure level to +2. For the third, I set it to -2. Now I have three exact photos with 3 different exposure levels. If you do adjust your exposure in the first image, then do the math to make exposure 2 as +2 from that number and the third as -2 from the original.
For example, if you modify the exposure in the original to +.50 and then create two virtual copies, your second copy should be +2.50 and the third should be -1.50.
Export these photos to somewhere you can find them.
Photomatix
Now, open Photomatix! Click on “Load Bracketed Photos” and find your three exposure-doctored photos.

Make sure that your exposure brackets are set correctly.
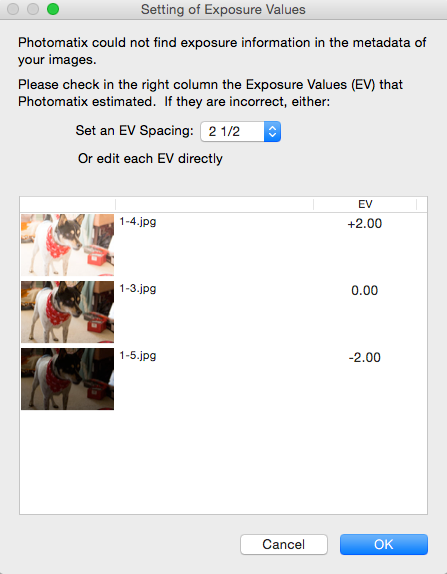
After clicking “Ok”, you can modify the settings as necessary, but I typically leave them alone. When finished, click “Align and merge to HDR”. If you shoot three (or more) photos from your camera, there is a chance that the three images are slightly unaligned. Photomatix tries to fix this. Because I use one exposure and enhance the exposure on copies, this is mainly unnecessary.
Photomatix will apply your images on top of each other and will smartly attempt to find the best aspects of each to show and enhance. Photomatix comes with boatloads of presets and you can find more in abundance on the internet. I use Trey’s, but often tweak his presets myself using the toolbar on the left.
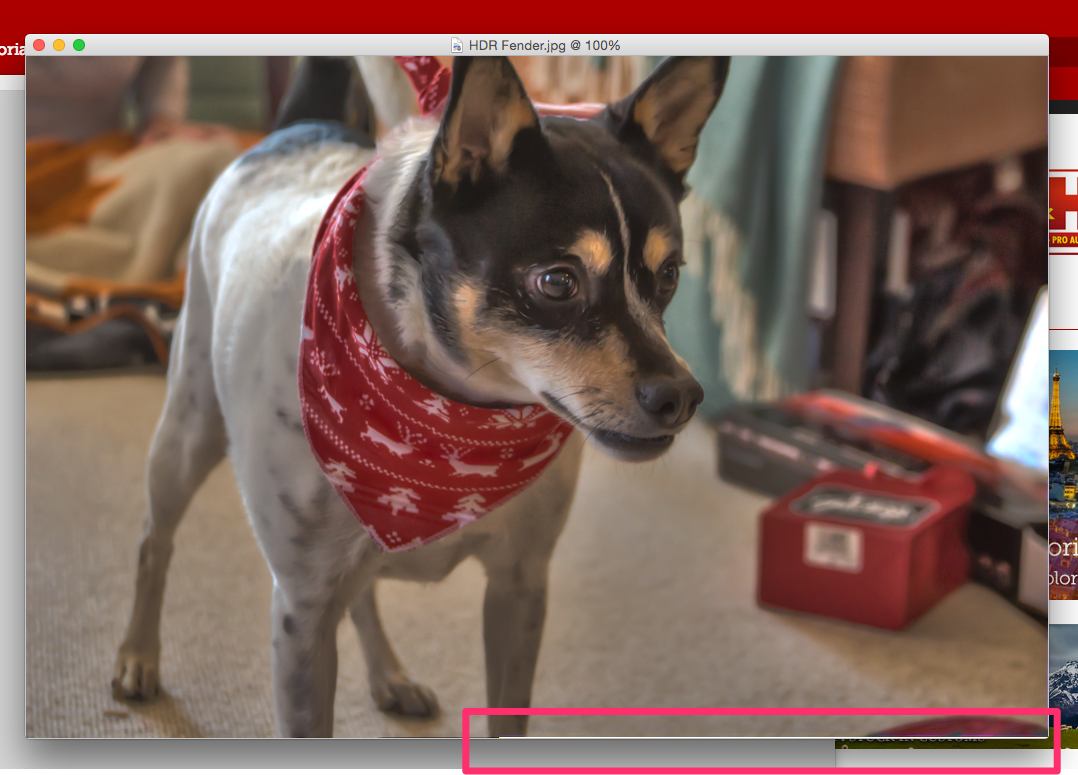
Once you find the settings you like, click the “Apply” button…

Save it and open it up in an application like Photograph to apply a very small crop to remove the white space that always exists as an orphan of this process.
Once you’ve done this, you’re done. I do other things such as making smaller sizes for the web. I also use Lightroom’s Watermark feature on export to apply my signature. Combat stealing anywhere I can. Photography, however, is an art. Find your art and your expression. Use these tools or others. There’s no right way to do anything, outside of fundamentals. Experiment and have fun!
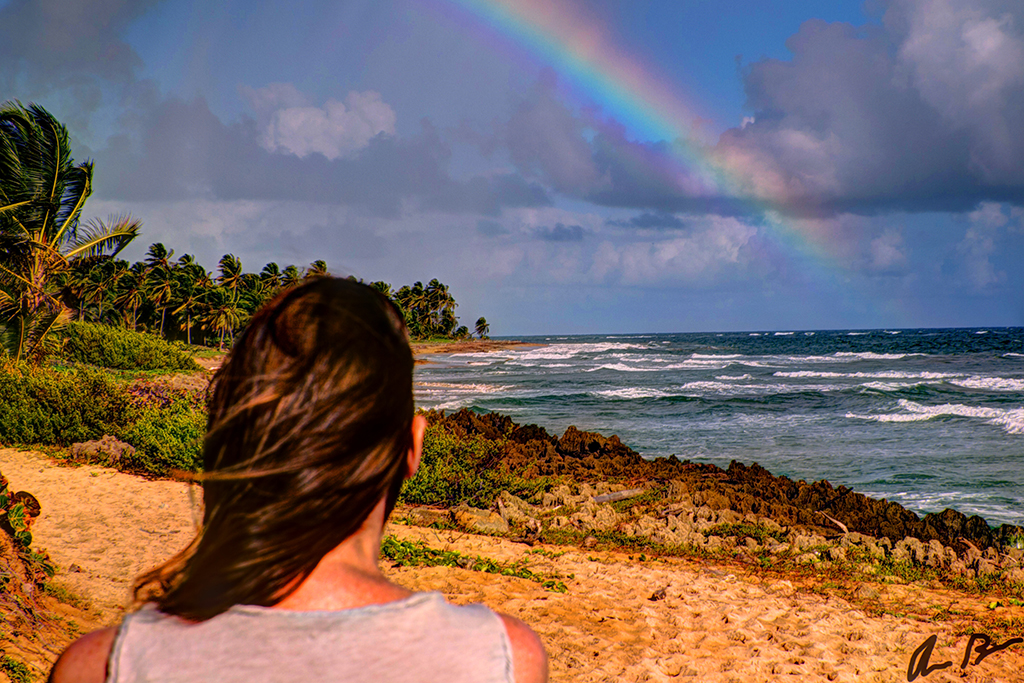
Here’s the final product!
